Scala/Sparkプログラミングをjupyter+brunelで快適に♫
Scala/Sparkだいすきですが、今度働くことになる会社はPython文化。
Scalaだって、Jupyter Notebook使えるし、matplotlibみたいに、ビジュアライゼーションできるよ!ということをアピールしたい、というのがモチベーションです。
ScalaをJupyterで使うために
Jupyter NotebookはもともとPythonの開発用にiPython Notebookとして開発されていましたが、
最近はカーネルさえインストールすれば、BashでもRubyでも、なんでも動くようになっていますね。
ということで、今回はScala/Sparkが動くカーネルを入れて動かしてみます。
Scalaを動かすためのカーネルとしては、Apache Toreeを使います。
Toree以外にもJupyter Notebook用Scalaカーネルとしては以下もありますが、開発が活発そうなのと、Apache Incubatorプロジェクトになっているので、
Toreeを選びました。
* IScala
* ISpark
* jupyter-scala
Brunelとは
PythonでいうMatplotlibのようなビジュアライゼーションライブラリとして、Scalaでは、Brunelが使えます。
ちなみにBrunelはScala以外にもPythonとRでも使えます。
結構おしゃれなグラフが色々かけて楽しそうです。
インストール手順
Toreeをインストールして、Jupyter Notebookを起動してみます。
手順は簡単。
pip install https://dist.apache.org/repos/dist/dev/incubator/toree/0.2.0/snapshots/dev1/toree-pip/toree-0.2.0.dev1.tar.gz
jupyter toree install --spark_home=/path/to/spark
jupyter notebook
早速試してみる
val ds = spark.read.option("header","true").csv("/Users/chiehayashida/work/tmp/test.csv")
ds.show()
//+----+----+
//|col1|col2|
//+----+----+
//|   1|   1|
//|   2|   2|
//|   3|   1|
//|   4|   5|
//|   5|   2|
//+----+----+

// Brunelパッケージをダウンロード・インクルードする。
%AddJar -magic https://brunelvis.org/jar/spark-kernel-brunel-all-2.4.jar

// brunelで描画するために%%brunelを入れる
%%brunel
data('ds') bar x(col1) y(col2:reverse) label(col2) legends(all) title("test")

気づいたこと
- Brunelの対応するSparkバージョン
Brunelでは現在Spark2.1以上には対応していないようで、
以下のエラーが出てしまう。
%%brunel
data('ds') x(a) y(b)
// エラー内容
//Magic brunel failed to execute with error:
//org/apache/spark/sql/DataFrame
- 軸名の編集ができない Brunelで色々いじってみたけれど、X軸・Y軸の名前の編集ができなそう。
dein.vimを使ってvimのプラグイン管理をする
dein.vimは、vimプラグイン管理ツールの一つ。 今までNeoBundleというプラグイン管理ツールが主流だったが、最近はdein.vimを使う人も多いらしい。
dein.vimのインストール
$ mkdir -p ~/.vim/dein/repos/github.com/Shougo/dein.vim
$ git clone https://github.com/Shougo/dein.vim.git \
    ~/.vim/dein/repos/github.com/Shougo/dein.vim
.vimrcを含む自分カスタマイズの環境設定ファイルをGitHub上においているので、これをクローンして、.vimrcを配置する
git clone https://github.com/chie8842/configs.git
configs/files/vimrc ~/.vimrc
vimを立ち上げると設定ファイルに書かれていてまだインストールされていないプラグインをインストールしはじめる。
$ vim
[dein] Not installed plugins: ['neosnippet', 'vimproc.vim', 'neomru.vim', 'vim-monokai', 'neocomplete.vim', 'nerdtree']
[dein] Update started: (2017/03/27 17:14:48)
Python3.5.3+conda+Jupyter Notebookでpyarrow(apache arrow)を使えるようにする
pythonのライブラリには、apache Arrowではない、arrowという日付や時刻に関する処理を行うライブラリもあるので注意。
ドキュメントでは、pipでインストールできると書いてあるのに、 pipではそんなパッケージはないと怒られた。
chie8842@chie-no-ubuntu:~/work/tensorflow$ pip install pyarrow
Collecting pyarrow
  Could not find a version that satisfies the requirement pyarrow (from versions: )
No matching distribution found for pyarrow
JIRAを見ると、pipはarrow0.2では使えなくて、次のバージョンから対応する予定らしい。
https://issues.apache.org/jira/browse/ARROW-240
仕方ないのでconda環境構築。
※3/8現在、pyarrowの対象バージョンは、2.7,3.4,3.5のみ。
最新のanaconda3-4.3.0はpython3.6ベースなので、
python3.5.2ベースのanaconda3-4.2.0を入れる。
chie8842@chie-no-ubuntu:~/work/tensorflow$  pyenv install anaconda3-4.2.0
chie8842@chie-no-ubuntu:~/work/tensorflow$ pyenv local anaconda3-4.2.0
chie8842@chie-no-ubuntu:~/work/tensorflow$ python --version
Python 3.5.2 :: Anaconda 4.2.0 (64-bit)

## 上記でpythonバージョンが切り替わっていない場合は、以下を実施して環境を更新する
chie8842@chie-no-ubuntu:~/work/tensorflow$ pyenv rehash


chie8842@chie-no-ubuntu:~/work/tensorflow$ conda create -n py3.5.3-conda4.2.0 python=3.5.3 anaconda
chie8842@chie-no-ubuntu:~/work/tensorflow$ source ~/.pyenv/versions/anaconda3-4.2.0/bin/activate py3.5.3-conda4.2.0
(py3.5.3-conda4.2.0) chie8842@chie-no-ubuntu:~/work/tensorflow$ conda info -e
# conda environments:
#
py3.5.3-conda4.2.0    *  /home/chie8842/.pyenv/versions/anaconda3-4.2.0/envs/py3.5.3-conda4.2.0
root                     /home/chie8842/.pyenv/versions/anaconda3-4.2.0

(py3.5.3-conda4.2.0) chie8842@chie-no-ubuntu:~/work/tensorflow$ conda update conda
(py3.5.3-conda4.2.0) chie8842@chie-no-ubuntu:~/work/tensorflow$ conda install -c conda-forge pyarrow
ついでにほかのライブラリもインストールしておく。
(py3.5.3-conda4.2.0) chie8842@chie-no-ubuntu:~/work/tensorflow$ conda install matplotlib seaborn scikit-learn
インストールされているライブラリ一覧を見る
(py3.5.3-conda4.2.0) chie8842@chie-no-ubuntu:~/work/tensorflow$ conda list (-n environment_name)
jupyter notebookを立ち上げる
jupyter notebook
これだとpyarrowが使えなかった。。。
py3.5.3-conda4.2.0をdeactivateして、condaのrootにpyarrowをインストールして、jupyter notebookを再起動すると、使えるようになってた。
docker インストールとTensorflowコンテナの起動
Dockerのインストール・設定とTensorflowコンテナを起動した時の手順。
Dockerインストール手順はちょくちょく変わっているようなので、最新の情報は公式ドキュメントを参照すること。
公式ドキュメントでのUbuntuへのDockerインストール手順
Get Docker for Ubuntu - Docker Documentation
Dockerインストール
sudo apt-get update
# …
# Reading package lists... Done

sudo apt-get -y install \
linux-image-extra-$(uname -r) \
linux-image-extra-virtual
# …
# Setting up linux-image-generic (4.4.0.66.70) ...
# Setting up linux-image-extra-virtual (4.4.0.66.70) ...
curl -fsSL https://download.docker.com/linux/ubuntu/gpg | sudo apt-key add -
# [sudo] password for chie8842:
# OK
sudo apt-key fingerprint 0EBFCD88
# pub   4096R/0EBFCD88 2017-02-22
#       Key fingerprint = 9DC8 5822 9FC7 DD38 854A  E2D8 8D81 803C 0EBF CD88 <- 公式ドキュメント(https://docs.docker.com/engine/installation/linux/ubuntu/#install-using-the-repository)に載っているフィンガープリントと一致しているか確認すること。
uid                  Docker Release (CE deb) <docker@docker.com>
# sub   4096R/F273FCD8 2017-02-22

sudo add-apt-repository \
"deb [arch=amd64] https://download.docker.com/linux/ubuntu \
$(lsb_release -cs) \
stable"

sudo apt-get update
# …
# Reading package lists... Done
sudo apt-get install docker-ce
apt-cache madison docker-ce
#  docker-ce | 17.03.0~ce-0~ubuntu-xenial | https://download.docker.com/linux/ubuntu xenial/stable amd64 Packages
sudo docker run hello-world
# Unable to find image 'hello-world:latest' locally
# latest: Pulling from library/hello-world
# 78445dd45222: Pull complete
# BDigest: sha256:c5515758d4c5e1e838e9cd307f6c6a0d620b5e07e6f927b07d05f6d12a1ac8d7
# Status: Downloaded newer image for hello-world:latest

# Hello from Docker!
# This message shows that your installation appears to be working correctly.

# To generate this message, Docker took the following steps:
#  1. The Docker client contacted the Docker daemon.
#  2. The Docker daemon pulled the "hello-world" image from the Docker Hub.
#  3. The Docker daemon created a new container from that image which runs the
#     executable that produces the output you are currently reading.
#  4. The Docker daemon streamed that output to the Docker client, which sent it
    to your terminal.

# To try something more ambitious, you can run an Ubuntu container with:
#  $ docker run -it ubuntu bash

# Share images, automate workflows, and more with a free Docker ID:
#  https://cloud.docker.com/

# For more examples and ideas, visit:
#  https://docs.docker.com/engine/userguide/
インストール後の設定
現在のユーザでDockerを実行できるように権限付与する
sudo groupadd docker
# groupadd: group 'docker' already exists
sudo usermod -aG docker $USER
docker run -it ubuntu bash
# docker: Got permission denied while trying to connect to the Docker daemon socket at unix:///var/run/docker.sock: Post http://%2Fvar%2Frun%2Fdocker.sock/v1.26/containers/create: dial unix /var/run/docker.sock: connect: permission denied.

# 公式ドキュメントの通りだと、ここでdocker run に成功するはずだが、
# 上記のように失敗する。OS再起動したらうまくいくようになった。
sudo shutdown -r now
docker run -it ubuntu bash
# Hello from Docker!
# This message shows that your installation appears to be working correctly.

# To generate this message, Docker took the following steps:
#  1. The Docker client contacted the Docker daemon.
#  2. The Docker daemon pulled the "hello-world" image from the Docker Hub.
#  3. The Docker daemon created a new container from that image which runs the
#     executable that produces the output you are currently reading.
#  4. The Docker daemon streamed that output to the Docker client, which sent it
#     to your terminal.

# To try something more ambitious, you can run an Ubuntu container with:
#  $ docker run -it ubuntu bash

# Share images, automate workflows, and more with a free Docker ID:
#  https://cloud.docker.com/

# For more examples and ideas, visit:
#  https://docs.docker.com/engine/userguide/
Dockerサービスの起動と自動起動の設定
sudo systemctl enable docker
# [sudo] password for chie8842:
# Synchronizing state of docker.service with SysV init with /lib/systemd/systemd-sysv-install...
# Executing /lib/systemd/systemd-sysv-install enable docker

sysv-rc-conf --list |grep docker
# docker       0:off      1:off   2:on    3:on    4:on    5:on    6:off
# 自動起動がONになっていない場合は、自動起動をONにする。
sudo sysv-rc-conf docker on
Tensorflowコンテナの起動
docker run -it -p 8888:8888 gcr.io/tensorflow/tensorflow # 初回はDockerイメージのダウンロードが行われるので時間がかかる
# …
#     Copy/paste this URL into your browser when you connect for the first time,
#     to login with a token:
#         http://localhost:8888/?token=******* <-このURLでブラウザを開くと、Jupyter Notebookにアクセスできる。
開いたJupyter Notebookのキャプチャ
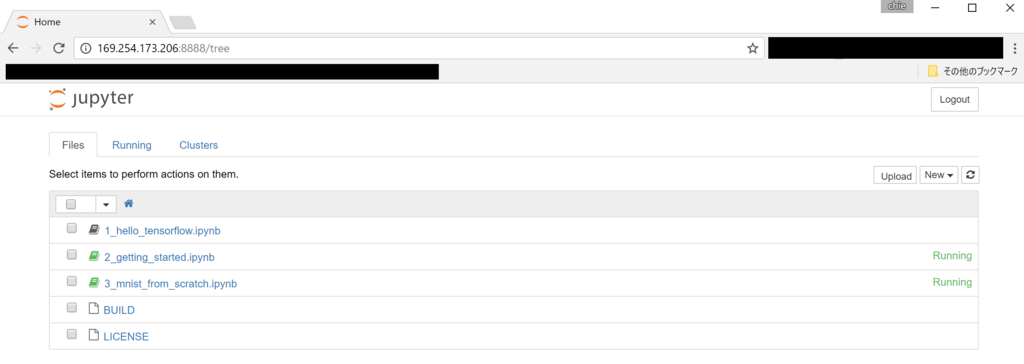
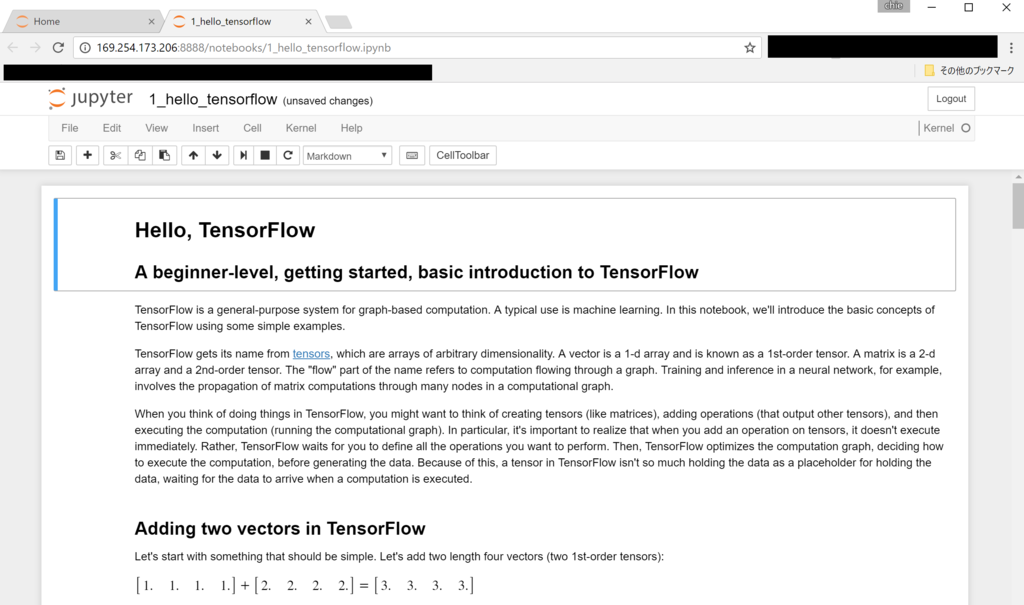
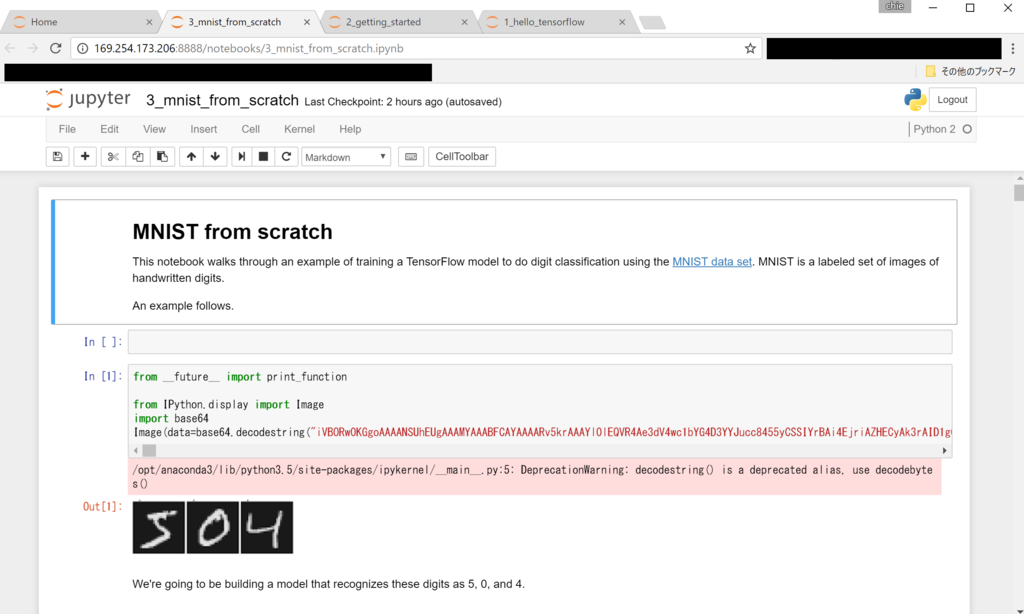
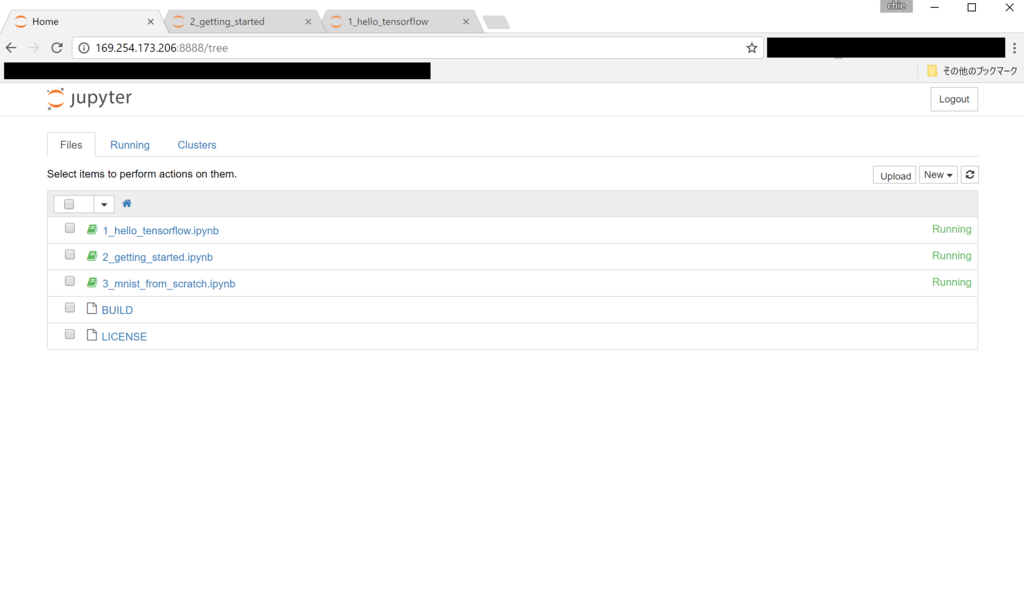
デフォルトでGetting StartedやMNistなどのサンプルのノートブックが入っている。


起動スクリプトrc.localがFailする場合の対処
/etc/rc.localスクリプトで共有ディレクトリのマウント処理を行うようにしていたのだけれど、 なぜかわからないけれど、dockerを入れた後に、再起動してもマウントされなくなっていた。
source /etc/rc.local
とすると、きちんとマウントされる。 rc.localのサービスステータスを確認すると、以下のようになっていた。
chie8842@chie-no-ubuntu:~$ sudo systemctl start rc-local
● rc-local.service - /etc/rc.local Compatibility
   Loaded: loaded (/lib/systemd/system/rc-local.service; static; vendor preset: enabled)
  Drop-In: /lib/systemd/system/rc-local.service.d
           └─debian.conf
   Active: failed (Result: exit-code) since 月 2017-03-27 14:22:15 JST; 2min 1s ago
  Process: 897 ExecStart=/etc/rc.local start (code=exited, status=32)

 3月 27 14:22:15 chie-no-ubuntu systemd[1]: Starting /etc/rc.local Compatibility...
 3月 27 14:22:15 chie-no-ubuntu rc.local[897]: mount: mount //169.254.173.204/share on /home/chie8842/share f
 3月 27 14:22:15 chie-no-ubuntu systemd[1]: rc-local.service: Control process exited, code=exited status=32
 3月 27 14:22:15 chie-no-ubuntu systemd[1]: Failed to start /etc/rc.local Compatibility.
 3月 27 14:22:15 chie-no-ubuntu systemd[1]: rc-local.service: Unit entered failed state.
 3月 27 14:22:15 chie-no-ubuntu systemd[1]: rc-local.service: Failed with result 'exit-code'.
...skipping...
● rc-local.service - /etc/rc.local Compatibility
   Loaded: loaded (/lib/systemd/system/rc-local.service; static; vendor preset: enabled)
  Drop-In: /lib/systemd/system/rc-local.service.d
           └─debian.conf
   Active: failed (Result: exit-code) since 月 2017-03-27 14:22:15 JST; 2min 1s ago
  Process: 897 ExecStart=/etc/rc.local start (code=exited, status=32)

 3月 27 14:22:15 chie-no-ubuntu systemd[1]: Starting /etc/rc.local Compatibility...
 3月 27 14:22:15 chie-no-ubuntu rc.local[897]: mount: mount //169.254.173.204/share on /home/chie8842/share f
 3月 27 14:22:15 chie-no-ubuntu systemd[1]: rc-local.service: Control process exited, code=exited status=32
 3月 27 14:22:15 chie-no-ubuntu systemd[1]: Failed to start /etc/rc.local Compatibility.
 3月 27 14:22:15 chie-no-ubuntu systemd[1]: rc-local.service: Unit entered failed state.
 3月 27 14:22:15 chie-no-ubuntu systemd[1]: rc-local.service: Failed with result 'exit-code'.
手動で起動しようとしても失敗する。
chie8842@chie-no-ubuntu:~$ sudo systemctl start rc-local
Job for rc-local.service failed because the control process exited with erro                                r code. See "systemctl status rc-local.service" and "journalctl -xe" for det                                ails.
標準出力にあるコマンドを実行してみるが、原因はわからず。
chie8842@chie-no-ubuntu:~$ sudo systemctl start rc-local.service
Job for rc-local.service failed because the control process exited with erro                                r code. See "systemctl status rc-local.service" and "journalctl -xe" for det                                ails.
chie8842@chie-no-ubuntu:~$ journalctl -xe
 3月 27 14:10:21 chie-no-ubuntu systemd[1]: Time has been changed
-- Subject: Time change
-- Defined-By: systemd
-- Support: http://lists.freedesktop.org/mailman/listinfo/systemd-devel
--
-- The system clock has been changed to REALTIME microseconds after January
 3月 27 14:10:21 chie-no-ubuntu systemd[1]: snapd.refresh.timer: Adding 1h 5                                1
 3月 27 14:10:21 chie-no-ubuntu systemd[1]: snapd.refresh.timer: Adding 5h 3                                3
 3月 27 14:10:21 chie-no-ubuntu systemd[1]: apt-daily.timer: Adding 6h 51min
 3月 27 14:10:21 chie-no-ubuntu systemd[1080]: Time has been changed
-- Subject: Time change
-- Defined-By: systemd
-- Support: http://lists.freedesktop.org/mailman/listinfo/systemd-devel
--
-- The system clock has been changed to REALTIME microseconds after January
 3月 27 14:10:21 chie-no-ubuntu systemd[1695]: Time has been changed
-- Subject: Time change
-- Defined-By: systemd
-- Support: http://lists.freedesktop.org/mailman/listinfo/systemd-devel
--
-- The system clock has been changed to REALTIME microseconds after January
最終的に、起動スクリプトの最初にsleepを入れるとうまくいった。
sleep 10
mount -t cifs …
exit 0
機械学習で遊びたいときに使えるデータまとめ
GroupLens
Datasets | GroupLens
GroupLensは、推薦システム、オンラインコミュニティ、モバイルおよびユビキタステクノロジ、デジタルライブラリ、地理情報システムに特化したミネソタ大学のコンピュータサイエンスおよびエンジニアリング部門の研究室。
推薦システムの入力データとして利用できるデータセットが用意されている。
映画の視聴履歴データMovieLensが特に有名。
MovieLensは、csv形式で、データの欠落やばらつきがあるので、前処理も含めた処理を行う必要がある。
100k、10M、20Mなどいくつかのデータ量のデータセットがあり、それぞれデータ形式が微妙に違う。
Wikipedia
Wikipedia:データベースダウンロード - Wikipedia
Wikipediaのデータ。
形態素解析を行うような処理で利用される。
データはXML形式で記述されているので、XMLをparseする前処理が必要。
UCIマシンラーニングレポジトリ
UCI Machine Learning Repository: Data Sets
様々な機械学習の論文などで利用されている機械学習用データのリポジトリ。
たくさんのデータセットが登録されている。
各データセットの特徴はあまり見やすくない。
https://www.yelp.com/dataset_challengeYelp Captcha
Yelpが提供しているデータセット。
飲食店の情報やマスキングされた利用者のデータ。
AWSのパブリックデータセット
大規模なデータセットのリポジトリ | AWS のパブリックデータセット
AWSが提供しているデータセット。
Amazon Elastic Block Store (Amazon EBS) スナップショットと Amazon Simple Storage Service (Amazon S3) バケットのいずれかのフォーマットで提供される。
提供されるデータの例:
* AWS でのランドサット: ランドサット 8 号衛星により作成中の地球全土の衛星画像コレクション (解像度は中程度)
* 1000 ゲノムプロジェクト: 人の遺伝的多様性の詳細なマップ
* Google ブックスの N-gram: Google ブックスの N-gram コーパスを含むデータセット
Kaggle
Datasets | Kaggle
機械学習コンペティションKaggleのデータセット。
コンペ用のデータだが、データだけダウンロードしてコンペに応募しなくてもOK。
LIBSVM
LIBSVM Data: Classification, Regression, and Multi-label
LIBSVMは、機械学習に適した形式でデータを読み込むためのオープンソースのAPI及びデータ形式のこと。
このLIBSVMのドキュメントページに、libsvm形式のデータセットの入手先がまとまっている。
データのクラス数や特徴量の数、データ量なども確認できる。
楽天 Rakuten Institute of Technology | 楽天データ公開 楽天技術研究所が大学、公的研究機関の研究での利用のために公開しているデータ。
- 楽天市場 全商品データ (約1億5600万商品)、レビューデータ (約6400万レビュー)
- 楽天トラベル 施設データ (約13万施設)、レビューデータ (約620万レビュー)
- 楽天GORA 施設データ (1,669施設)、レビューデータ (約32万レビュー)
- 楽天レシピ レシピデータ (約80万レシピ)、レシピ画像 (約80万画像)、Pickupレシピ (1,854レシピ)、デイリシャスニュース (362件)
- 楽天Viki ビデオ属性情報 (623本)、ユーザー行動評価 (約488万件
利用できるビッグデータに関するスライドも見つけたので貼っておく。
2017/5/28追記
dataset CV Datasets on the web
GitHub - caesar0301/awesome-public-datasets: An awesome list of high-quality open datasets in public domains (on-going). By everyone, for everyone!学習済みモデル Model Zoo · BVLC/caffe Wiki · GitHub
GitHub - fchollet/deep-learning-models: Keras code and weights files for popular deep learning models.
MXNet Model Zoo — mxnet documentation
Ubuntu16.04でVNCサーバを起動する
# VNCサーバのインストール
sudo apt-get install vnc4server

# VNC接続時のパスワードの設定
vncpasswd
# Password:
# Verify:

# VNCサーバの初回起動。これによって設定ファイルが作成される。
vncserver :1
# New 'chie-no-ubuntu:1 (chie8842)' desktop is chie-no-ubuntu:1

# Starting applications specified in /home/chie8842/.vnc/xstartup
# Log file is /home/chie8842/.vnc/chie-no-ubuntu:1.log


# 起動確認ができたらVNCサーバを停止する
vncserver -kill :1
~/.vnc/xstartupの内容を以下のとおりにする。
#!/bin/sh

# Uncomment the following two lines for normal desktop:
# unset SESSION_MANAGER
# exec /etc/X11/xinit/xinitrc

[ -x /etc/vnc/xstartup ] && exec /etc/vnc/xstartup
[ -r $HOME/.Xresources ] && xrdb $HOME/.Xresources
xsetroot -solid grey
vncconfig -iconic &
x-terminal-emulator -geometry 80x24+10+10 -ls -title "$VNCDESKTOP Desktop" &
x-window-manager &

gnome-panel &
gnome-settings-daemon &
metacity &
nautilus &
VNCサーバを起動する
vncserver :1
再起動後もvncserverを起動しておきたい場合は、~/.bashrcもしくは/etc/rc.localのexit 0の前に以下を追記する。 ※/etc/rc.localに記述するときは、vncの設定をrootで行っておくこと。
vncserver :1
参照: